This comprehensive guide explores the Bearish Harami candlestick pattern, a powerful technical analysis tool for identifying potential trend reversals in cryptocurrency and financial markets. The article covers how to recognize Harami patterns—where a small bearish candle is contained within a large bullish candle—and explains the psychology behind this reversal signal. Readers will learn confirmation techniques using subsequent candlestick behavior, understand the distinction between Bearish and Bullish Harami patterns, and discover the stronger Harami Cross variation. The guide emphasizes that while Harami patterns provide valuable trading signals, successful traders must combine them with additional technical indicators, volume analysis, support/resistance levels, and market context on platforms like Gate. Practical FAQ sections address pattern reliability, timeframe performance, and operational strategies for cryptocurrency traders seeking to improve decision-making through multi-faceted technical analysi
Summary
The Harami candlestick pattern is a powerful technical analysis tool used by traders to identify potential trend reversals in financial markets, including cryptocurrency trading. This pattern consists of two candles with specific characteristics that signal a possible change in market momentum.
Key points about Harami candles include:
- The Harami candlestick pattern is primarily used to spot trend reversals in price movements
- A Bullish Harami Candle forms when a large bearish candlestick is followed by a smaller bullish candlestick that remains within the range of the first candle's body
- A Bearish Harami Candle forms when a large bullish candlestick is followed by a smaller bearish candlestick contained within the first candle's body
- The pattern's name comes from the Japanese word "harami," meaning "pregnant," which describes the visual appearance of the smaller candle being contained within the larger one
What Is a Harami Candle?
Harami candles represent a specific type of candlestick pattern that traders utilize to forecast future price movements in financial markets. This pattern is classified as a reversal pattern, indicating that it can signal a potential shift in the current market direction. Understanding Harami patterns is essential for investors when making informed decisions about buying or selling cryptocurrencies or other assets.
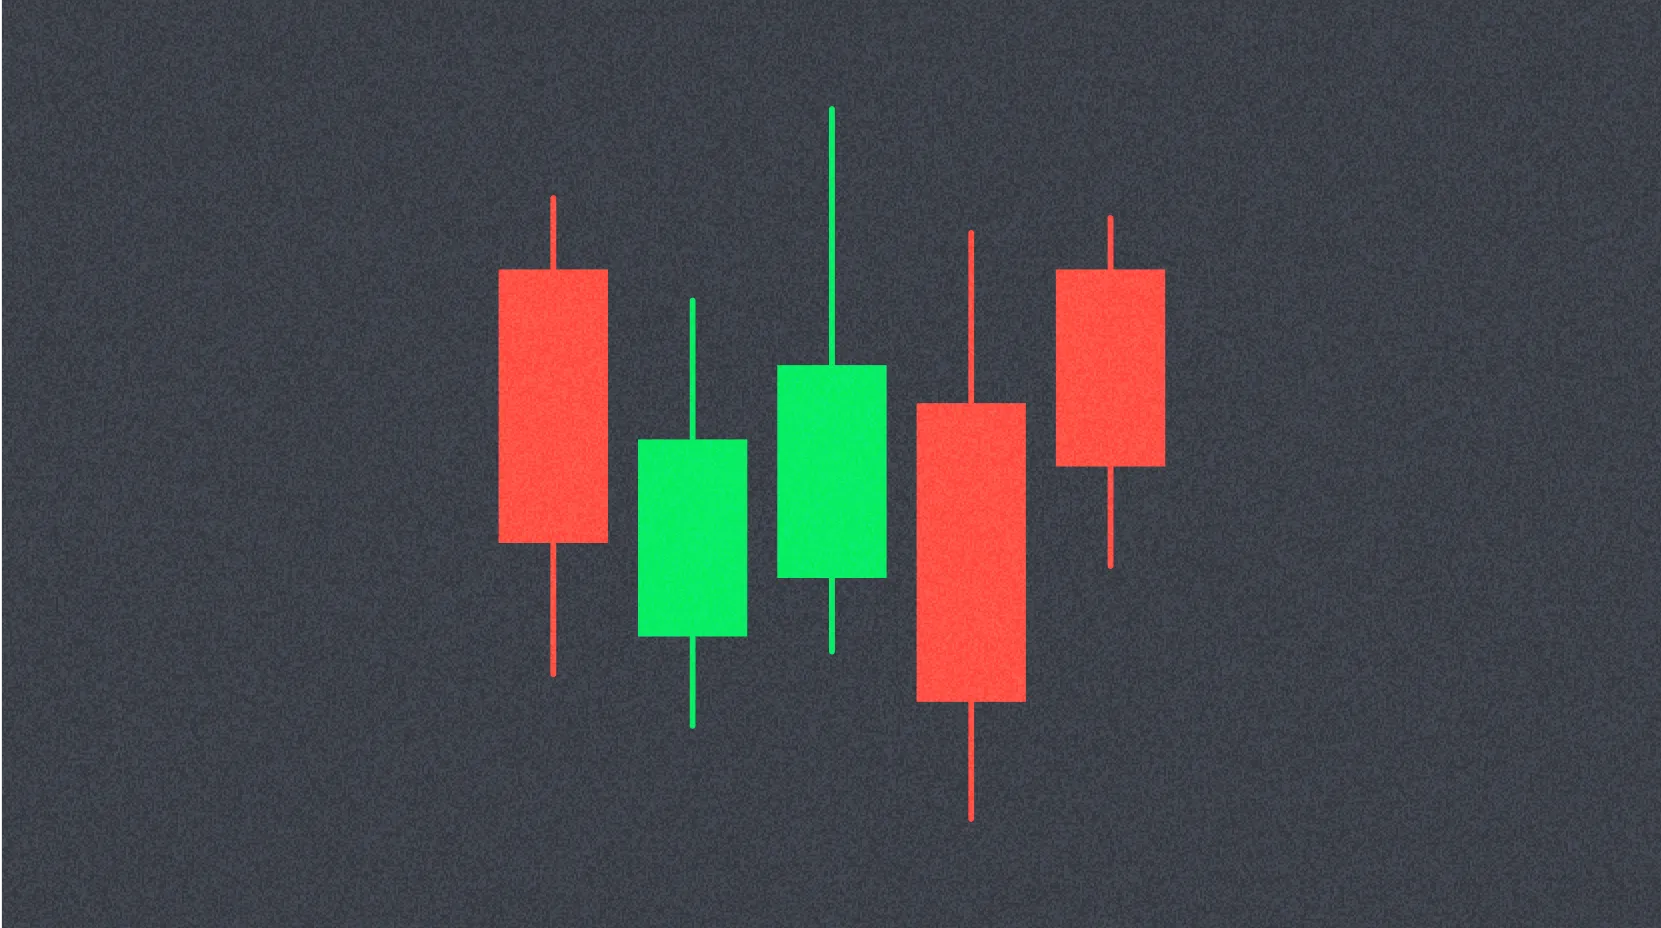
The Harami candlestick pattern forms when the real body of one candlestick is completely engulfed by the real body of the previous candlestick. The term "harami" originates from Japanese, meaning "pregnant," which aptly describes the visual appearance where the second candle appears to be contained within the first, much like a pregnancy. This pattern can manifest in either an uptrend or a downtrend, making it versatile for various market conditions.
The real body of a candlestick refers to the rectangular area between the opening and closing prices, excluding the wicks or shadows that extend above and below. When analyzing Harami patterns, traders focus on the relationship between these real bodies rather than the full range including wicks.
To accurately identify a Harami candlestick pattern, traders should look for two critical characteristics:
-
Size Relationship: The second candlestick must be noticeably smaller than the first candlestick. This size difference is crucial as it indicates a reduction in momentum from the previous trading session.
-
Containment: The second candlestick's real body must be entirely contained within the first candlestick's real body. This means both the opening and closing prices of the second candle fall within the range of the first candle's real body.
The significance of these characteristics lies in what they reveal about market psychology. The large first candle shows strong momentum in one direction, while the smaller contained second candle suggests that momentum is weakening, potentially leading to a reversal.
How to Confirm Trend Reversal With Harami Candles
Identifying a potential Harami candlestick pattern is only the first step in the trading process. To make informed trading decisions, it is essential to wait for market confirmation of the reversal signal. Premature action based solely on the appearance of a Harami pattern can lead to false signals and potential losses.
The most reliable method to confirm a trend reversal is to observe the behavior of the next candlestick that forms after the Harami pattern. This confirmation candle provides crucial information about whether the market will indeed reverse direction or continue in its previous trend.
For a Bullish Harami pattern (appearing in a downtrend), confirmation occurs when the next candlestick closes as a bullish candle, ideally with a closing price above the high of the second Harami candle. This confirms that buyers have gained control and the market has reversed into an uptrend. The stronger the bullish confirmation candle (larger body, higher close), the more reliable the reversal signal.
Conversely, for a Bearish Harami pattern (appearing in an uptrend), confirmation happens when the subsequent candlestick closes as a bearish candle, preferably with a closing price below the low of the second Harami candle. This confirms that sellers have taken control and the market has reversed into a downtrend.
Traders often enhance their confirmation process by incorporating additional technical indicators such as volume analysis, support and resistance levels, or momentum oscillators. Higher trading volume during the confirmation candle strengthens the reversal signal, while low volume may suggest a weak or false signal.
There are two primary types of Harami candlestick patterns that traders monitor: the Bearish Harami pattern and the Bullish Harami pattern. Each serves a distinct purpose in identifying potential market reversals from different trend directions.
Bullish Harami Candle Pattern
A Bullish Harami Candle pattern signals a potential reversal from bearish to bullish momentum, offering traders an opportunity to enter long positions. This pattern typically appears at the end of a downtrend and suggests that selling pressure is weakening while buying interest begins to emerge.
The formation of a Bullish Harami pattern requires specific conditions. First, there must be a large bearish candlestick that reflects strong selling pressure and downward momentum. This is followed by a smaller bullish candlestick whose opening price falls within the range of the previous candle's body. The smaller size of the second candle indicates that sellers are losing control and buyers are starting to step in, though not yet with full force.
Bullish Harami patterns can exhibit varying characteristics in terms of their candlestick wicks or tails. These tails can be either short or long, depending on the price volatility during the trading session. However, regardless of tail length, the key identifying feature remains the containment of the second candle's body within the first.
The reliability of a Bullish Harami pattern increases significantly when it appears in an oversold market condition. Oversold conditions, often identified through indicators like the Relative Strength Index (RSI), suggest that the asset has experienced excessive selling and may be due for a bounce. When a Bullish Harami forms in such conditions, it provides stronger evidence of an impending reversal.
It is important to note that not all Bullish Harami patterns result in significant or sustained price increases. Some reversals may be minor or short-lived. Therefore, traders typically use this pattern as one signal among several to enter long positions, combining it with other technical analysis tools and market context for better decision-making.
Bearish Harami Candle Pattern
A Bearish Harami Candle pattern indicates a potential reversal from bullish to bearish momentum, alerting traders to possible opportunities for short positions or profit-taking on long positions. This pattern typically emerges at the peak of an uptrend and suggests that buying pressure is diminishing while selling interest begins to surface.
The formation of a Bearish Harami requires a specific sequence of candles. The first candlestick is typically a long bullish candle that demonstrates strong buying pressure and upward momentum. This is followed by a small bearish candle that forms entirely within the body of the first candle. The opening price of the second candle is within the range of the first candle's body, and it closes lower, creating a small bearish body.
This pattern is considered bearish because it reveals a shift in market dynamics. The large bullish first candle shows that bulls were in firm control, pushing prices significantly higher. However, the smaller bearish second candle indicates that bulls have lost their momentum and bears are beginning to exert influence. The containment of the second candle within the first suggests indecision and a potential turning point.
While the Bearish Harami is not considered as reliable as some other candlestick patterns (such as the Bearish Engulfing pattern), it remains a valuable tool for identifying potential reversals in uptrends. Its effectiveness increases when combined with other technical indicators and market context.
Similar to the Bullish Harami pattern, proper confirmation is essential before acting on a Bearish Harami signal. After identifying this pattern, traders should wait for the next candlestick to close. Ideally, the confirmation will appear as a bearish candlestick that closes below the low of the second Harami candle. This confirmation validates the reversal signal and may trigger a sell signal, prompting investors to consider exiting long positions or entering short positions.
Traders should also consider the overall market context, including support levels, trend strength, and volume patterns, before making trading decisions based on a Bearish Harami pattern alone.
What Is a Harami Cross Candle?
The Harami Cross is a specialized variation of the standard Harami pattern that many traders consider to be a stronger reversal signal. The distinguishing feature of a Harami Cross is that the second candle has a very small real body, resembling a Doji candlestick. A Doji forms when the opening and closing prices are nearly identical, creating a cross-like or plus-sign appearance.
For a pattern to qualify as a Harami Cross, the smaller the real body of the second candle, the better. In an ideal Harami Cross, the second candle is essentially a perfect Doji, where the opening and closing prices are exactly the same or differ by an insignificant amount. This minimal body size is crucial because it represents maximum indecision in the market.
The significance of the Harami Cross lies in what the Doji-like second candle reveals about market sentiment. After a strong directional move (represented by the large first candle), the absence of a substantial real body in the second candle indicates that the previous trend momentum has dissipated. Neither buyers nor sellers have gained clear control, suggesting that a reversal may be imminent.
Just like the regular Harami pattern, the Harami Cross can signal either a Bullish or Bearish trend reversal depending on its position within the overall price trend. The pattern's interpretation depends entirely on the market context in which it appears.
Several experienced traders attach greater importance to the Harami Cross pattern compared to the regular Harami pattern. The reasoning is that the Doji-like second candle represents a more dramatic shift from the strong momentum of the first candle, indicating a more significant change in market psychology. This stronger signal of indecision and potential reversal makes the Harami Cross particularly valuable for timing entries and exits.
Like standard Harami patterns, there are two distinct types of Harami Cross patterns: Bullish Harami Cross and Bearish Harami Cross.
Bullish Harami Cross Pattern
A Bullish Harami Cross appears during a downtrend and signals a potential reversal from bearish to bullish momentum. This pattern consists of specific characteristics that traders should recognize:
-
Trend Context: The pattern typically appears during a clear downward trend, where prices have been consistently declining. This context is essential for the pattern to be considered a valid reversal signal.
-
Reversal Signal: The Bullish Harami Cross indicates that market sentiment is shifting from a downward trend to either a neutral consolidation phase or an upward trend. This transition represents a potential turning point for traders to consider long positions.
-
First Candle Characteristics: The first candle is a strong red (bearish) body, meaning it is distinguishably large with a significant difference between opening and closing prices. This large bearish candle represents the continuation of the prevailing downtrend and strong selling pressure.
-
Second Candle Characteristics: The second candle resembles a green Bullish Doji, shaped like a cross because the opening and closing prices occur at nearly the same level. This candle is completely contained within the range of the red candle before it and does not extend beyond its boundaries. The cross-like shape indicates that buyers and sellers reached equilibrium after the strong selling of the previous session.
The power of the Bullish Harami Cross lies in the dramatic contrast between the strong bearish first candle and the indecisive Doji-like second candle, suggesting that downward momentum has stalled and a reversal may follow.
Bearish Harami Cross Pattern
A Bearish Harami Cross appears during an uptrend and signals a potential reversal from bullish to bearish momentum. This pattern exhibits the following characteristics:
-
Trend Context: The pattern typically appears during a clear upward trend, where prices have been consistently rising. This uptrend context is necessary for the pattern to serve as a meaningful reversal signal.
-
Reversal Signal: The Bearish Harami Cross indicates that market sentiment is transitioning from an upward trend to either a neutral consolidation phase or a downward trend. This shift warns traders of potential trend exhaustion and possible price declines.
-
First Candle Characteristics: The first candle is a strong green (bullish) body, meaning it is distinguishably large with a substantial difference between opening and closing prices. This large bullish candle represents the continuation of the existing uptrend and strong buying pressure.
-
Second Candle Characteristics: The second candle resembles a red Bearish Doji, shaped like a cross due to the opening and closing prices being nearly identical. This candle is fully contained within the green candle before it and remains within its range. The cross formation indicates that the market has reached a point of equilibrium after the strong buying of the previous session.
The Bearish Harami Cross is particularly significant because the Doji-like second candle following a strong bullish move suggests that buyers have exhausted their momentum and sellers may be preparing to take control.
Conclusion
While Harami candles and Harami Cross patterns provide valuable insights into potential market reversals, it is crucial that traders understand their limitations and use them as part of a comprehensive trading strategy rather than as standalone signals.
Traders should never make buying or selling decisions based solely on Harami candles. Instead, a holistic approach is necessary that incorporates multiple factors including:
- Previous Trends: Analyzing the strength and duration of the preceding trend helps determine the likelihood of a successful reversal
- Price Action Context: Examining support and resistance levels, chart patterns, and overall market structure provides essential context
- Project-Specific Developments: For cryptocurrency trading, staying informed about project news, technological updates, partnerships, and regulatory developments is crucial
- Macro Environment: Understanding broader economic conditions, market sentiment, and sector-wide trends helps frame individual trading decisions
- Additional Technical Indicators: Combining Harami patterns with volume analysis, momentum indicators, moving averages, and other tools increases signal reliability
Without incorporating these additional pieces of information, relying solely on Harami patterns to take trading positions carries excessive risk. False signals can occur, and even valid patterns may not result in significant price movements if other factors do not support the reversal.
Successful traders use Harami patterns as one component of a multi-faceted analysis approach, always confirming signals with additional evidence before committing capital to a position. This disciplined, comprehensive methodology significantly improves the probability of successful trades while managing risk appropriately.
FAQ
What are Bullish Harami and Bearish Harami candles?
Bullish Harami is a two-candle pattern where a large candle is followed by a small candle, signaling downtrend reversal. Bearish Harami is the opposite, indicating uptrend reversal. Both suggest potential trend changes.
How to identify and distinguish bullish and bearish harami candlestick patterns?
Bullish harami: a small white candle completely engulfed by a prior large black candle, signaling uptrend reversal. Bearish harami: a small black candle completely engulfed by a prior large white candle, indicating downtrend reversal. Both patterns suggest momentum shift.
In actual trading, how should you operate when bullish and bearish harami candles appear?
When a bullish harami appears, consider buying as it signals potential upward momentum. When a bearish harami forms, consider selling as it suggests potential downward pressure. However, harami patterns are less reliable than engulfing patterns, so combine with other indicators for confirmation.
How reliable is the Harami pattern? What are its success rate and risks?
Harami pattern success rate ranges from 60%-75%, depending on market conditions and trader skill. Risks include market volatility and individual stock fundamentals. Performance varies based on operational execution and market environment confirmation.
What is the difference between Harami patterns and other candlestick patterns (such as Engulfing and Doji)?
Harami is a weaker reversal pattern with two candlesticks where the second is contained within the first. Engulfing and Doji patterns are stronger reversal signals. Doji Harami combines Harami with a cross pattern, making it comparable to Engulfing in strength.
Harami patterns may show inconsistent performance across timeframes. Bullish and bearish Harami on different timeframes can signal varying trends. Traders should analyze multiple timeframes simultaneously for comprehensive market understanding and stronger confirmation signals.
* The information is not intended to be and does not constitute financial advice or any other recommendation of any sort offered or endorsed by Gate.