This comprehensive guide explains OHLC charts, the foundational tool for technical analysis in trading. OHLC stands for Open, High, Low, and Close prices—four critical metrics showing asset price movements across specified timeframes. The article covers chart types including bar and candlestick symbols, each offering distinct visual advantages for identifying market trends. Key sections explain how to interpret vertical heights, open-close positioning, and trend patterns to assess market sentiment and volatility. Common patterns like Doji, Hammer, and Marubozu are detailed with their trading implications. Using a Bitcoin candlestick example, the guide demonstrates real-world pattern recognition. Whether trading on Gate or analyzing traditional assets, mastering OHLC charts combined with risk management strategies significantly enhances trading accuracy and decision-making across various timeframes.
What Does OHLC Stand For?
The abbreviation OHLC stands for four essential criteria of an asset's price movement over a specific period of time. These four components form the foundation of technical analysis and price action trading:
- O (Open): The opening price at the beginning of the specified time period
- H (High): The highest price reached during the time period
- L (Low): The lowest price reached during the time period
- C (Close): The closing price at the end of the time period
These prices are determined over various time frames, such as a minute, hour, day, or week, depending on the trader's strategy and analysis requirements. Different symbols can be used to represent the four criteria collectively, and these symbols are often plotted into an OHLC chart to provide a comprehensive visual representation of price movements.
Understanding OHLC data is crucial for traders and investors as it provides insights into market sentiment, volatility, and potential trend reversals. This information applies across various asset classes, including bonds, stocks, commodities, and cryptocurrencies.
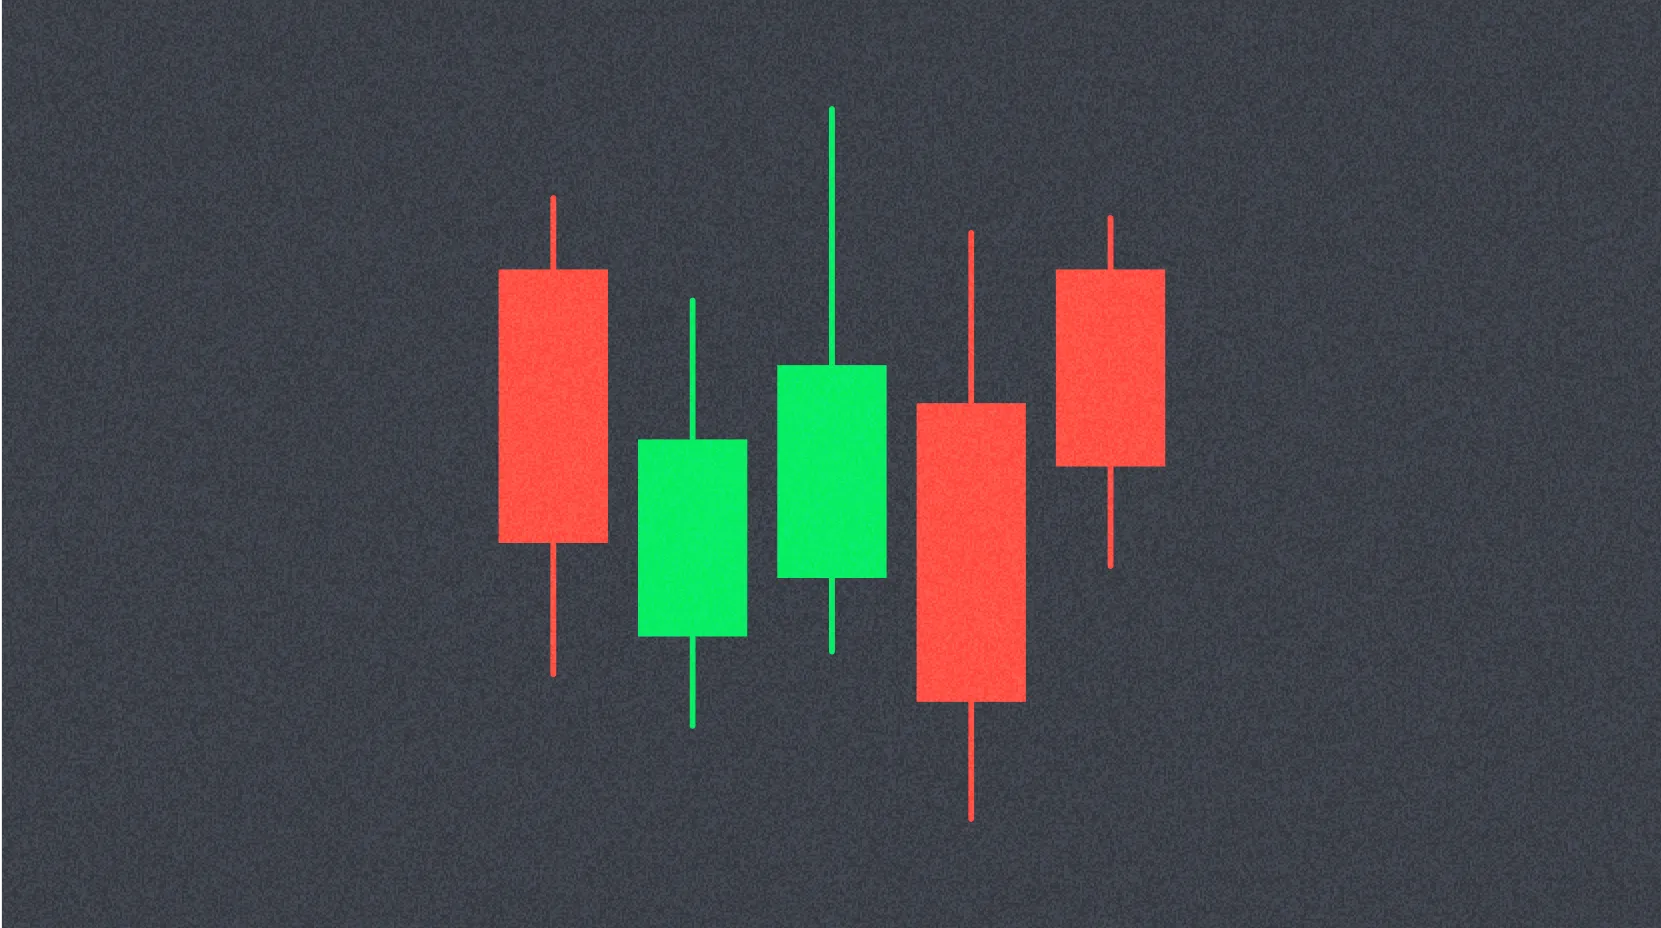
What Does an OHLC Chart Look Like?
An OHLC chart illustrates a series of sequential OHLC symbols that visually represent the open, high, low, and close of an asset during specified time periods. This visual representation makes it easier for traders to identify patterns and trends at a glance.
A typical OHLC chart includes multiple symbols plotted along an x and y graph. The y-axis represents the pricing scale of the asset, showing the range of price movements. The x-axis provides a time scale, segmented into equal increments that correspond to the chosen time frame (such as minutes, hours, or days).
In standard OHLC charts, symbols are typically provided in black. However, they may also be colored to visually represent whether the asset's price moved up or down during the particular time frame. This color-coding system enhances readability and allows for quick pattern recognition:
- Red symbols designate bearish periods, where the price of the asset declined
- Green symbols designate bullish periods, where the price of the asset increased
The visual nature of OHLC charts makes them particularly effective for identifying support and resistance levels, trend strength, and potential reversal points. Traders can quickly assess market conditions by observing the sequence and characteristics of these symbols.
How Are Different Types of OHLC Chart Symbols Structured?
Most OHLC charts use either bar chart symbols or candlestick chart symbols to represent price action. Each type has its own visual characteristics and advantages for technical analysis.
OHLC Bar Chart Symbols
Bar chart symbols are one of the oldest and most straightforward methods of representing OHLC data. There are generally two types of bar chart symbols: bullish symbols and bearish symbols.
A Bullish Bar Chart Symbol
This symbol includes multiple visual cues that represent the price action of a particular asset over a period of time:
-
A primary bar extends vertically from the designated "low" to the designated "high." The length of this primary bar represents the pricing range of this asset during the particular period, with longer bars indicating greater volatility.
-
Each of two horizontal tick marks branches off at a right angle from the primary bar. The positions of these two tick marks are compared to determine whether the symbol represents a bullish or bearish period:
- The left-hand tick mark is designated as "open," and indicates the asset's price at the initial point in the specified time period
- The right-hand tick mark is designated as "close." When the close tick mark is positioned higher than the open tick mark, this symbol represents a bullish period, indicating buying pressure dominated the time frame
A Bearish Bar Chart Symbol
In a bearish OHLC symbol, the closing price is lower than the opening price. Therefore, this symbol designates a bearish time period, commonly referred to as a "down day" among traders. In a down day, sellers are active in pushing prices lower toward the close of the time period, indicating selling pressure dominated the session.
The positioning of the close relative to the open provides valuable information about market sentiment and the balance between buyers and sellers during the specified time frame.
Candlestick Symbol
Candlestick symbols, originating from Japanese rice trading practices, have become the preferred charting method for many modern traders due to their enhanced visual clarity.
Like the bar chart symbol, a candlestick symbol graphically represents the open, high, low, and close price points. However, its structure provides additional visual information at a glance.
The candlestick symbol includes a main rectangular body that extends vertically from the open to the close. This vertical distance represents the pricing range between the opening and closing prices during the specific period of time.
Bullish Candlesticks:
When the close was higher than the open, the rectangular body is typically filled in with green or white as a quick visual cue. A green or white candlestick body represents a bullish symbol or an "up day," indicating buyers controlled the price action.
Bearish Candlesticks:
Alternatively, a body colored red or black designates that the close was lower than the open. Such a candlestick body represents a bearish symbol or a "down day," indicating sellers dominated the trading period.
Shadows or Wicks:
Depending on the asset's price action, candlestick symbols may also include two "shadows" or "wicks." The upper shadow extends above the rectangular body, while the lower shadow extends below the body. These shadows designate the highest and lowest prices achieved during the designated time period, providing crucial information about price rejection and market sentiment.
The length and positioning of these shadows offer valuable insights into the strength of buying or selling pressure and potential trend reversals.
How to Read an OHLC Chart?
Reading OHLC charts effectively requires understanding several key interpretation techniques. Experienced traders use these methods to gain insights into market dynamics and make informed trading decisions.
Vertical Height Analysis
The vertical height of an OHLC symbol serves as an indication of the asset's price volatility and trading range. The greater the price swing or range of prices, the greater the vertical height or length of the symbol.
A symbol having a large range over a given period of time is often characteristic of a volatile asset, which may present both opportunities and risks for traders. Conversely, symbols with minimal vertical height suggest periods of consolidation or low volatility, which may precede significant price movements.
Open and Close Positioning
The relative position of the open and close prices tells technical traders where the asset opened and closed relative to its high and low, providing insights into market sentiment and momentum.
Upper Wick Analysis:
If the asset had a large upper wick, but the close was much lower than the high, traders interpret this as buying pressure that died down toward the end of the period. This pattern may indicate profit-taking or the emergence of selling pressure.
Lower Wick Analysis:
If the asset had a large lower wick, but closed much higher than its low, this suggests that selling pressure died down toward the end of the period, with buyers stepping in to push prices higher.
Indecision Patterns:
The market may be undergoing a period of indecision when the open and close are positioned close together, as neither buyers nor sellers could make significant progress in either direction. This often occurs at key support or resistance levels.
Strong Directional Moves:
If the close is positioned far below the open, the asset experienced strong selling pressure during the period. Alternatively, if the close is far above the open, it demonstrates strong buying activity during the period.
Understanding these positioning dynamics helps traders assess the strength of trends and identify potential reversal points.
Trend Identification
Sequential patterns of colored symbols provide valuable information about market trends and their strength.
A sequential clustering of numerous green symbols typically represents an uptrend, indicating sustained buying pressure over multiple time periods. During a downtrend, more red symbols than green symbols often appear, reflecting persistent selling pressure.
These types of clusters can provide information about the trend direction, the strength of the trend, and potential exhaustion points. Traders often look for changes in the pattern of these clusters to identify potential trend reversals or continuations.
What Are Some Common OHLC Symbol Patterns?
Certain commonly occurring OHLC symbols and patterns are used by technical analysts to predict potential entry and exit trading positions. Recognizing these patterns is essential for effective technical analysis.
Doji
A Doji symbol occurs when the open and close prices are generally equal to one another, creating a cross-like appearance. The lengths of the Doji's upper and lower shadows can vary significantly.
If symbols occurring before the appearance of a Doji are bearish or red, the asset may be about to experience a bullish trend reversal. The Doji represents market indecision and often appears at significant turning points.
Trading Implications:
Traders typically wait for confirmation following a Doji before entering positions, as the pattern alone does not guarantee a reversal. A bullish candlestick following a Doji in a downtrend may confirm a reversal signal.
Dragonfly Doji
A Dragonfly Doji is a specific type of Doji symbol typically formed when the open and close prices are positioned at the highest point of the trading period. Notably, there is no upper shadow stemming from the high, giving it a distinctive T-shaped appearance.
A Dragonfly Doji typically represents a bullish signal if it has a longer lower shadow, indicating that sellers pushed prices significantly lower during the period, but buyers managed to push prices back up to the opening level by the close.
In addition, when the Dragonfly Doji appears at a pricing bottom after a downtrend, the market may be moving in a reverse direction, making it a potential entry signal for long positions.
Risk Management:
Traders should place stop-loss orders below the low of the Dragonfly Doji to manage risk in case the reversal fails to materialize.
Hammer
The hammer is a powerful reversal pattern that can signal either bullish or bearish trends depending on its context. It consists of a small body positioned near the high, with little or no upper shadow and a long lower shadow.
Hammers are considered bullish signals when they are formed during a downtrend or bearish trend, indicating that despite selling pressure pushing prices lower, buyers stepped in to drive prices back up near the opening level.
Pattern Characteristics:
The lower shadow should be at least twice the length of the body for the pattern to be considered valid. A hammer appearing after a sustained downtrend suggests that selling pressure may be exhausting and a reversal could be imminent.
Trading Strategy:
Traders typically wait for bullish confirmation in the following period before entering long positions based on a hammer pattern.
Marubozu
Marubozu signals are represented by a long candlestick main body with no upper or lower shadows, indicating strong directional momentum throughout the entire trading period. These signals can be either bullish or bearish.
Bullish Marubozu:
A bullish Marubozu signal comprises a long body (typically green or white) and is formed when the open equals the low, and the close equals the high. This signal indicates that buyers controlled the price of the asset from the start of the trading period to the close, with no selling pressure strong enough to create shadows. It is therefore considered a strong bullish signal, often appearing at the beginning of uptrends.
Bearish Marubozu:
A bearish Marubozu candle comprises a long body (typically black or red) and appears when the open equals the high for the period and the close equals the low for the period. A bearish Marubozu indicates that sellers controlled the price from the opening to the close, with no significant buying pressure throughout the period.
Trading Applications:
Marubozu patterns are particularly useful for identifying strong momentum and potential trend continuations. Traders often use these patterns to add to existing positions or enter new positions in the direction of the Marubozu.
OHLC Bitcoin Candlestick Chart: An Example
This example demonstrates a Bitcoin 1-minute OHLC candlestick chart based on one-minute time segments. This chart illustrates several of the common OHLC symbols and patterns summarized in previous sections.
Downtrend Identification:
At around 14:01, a sequence of two red candlesticks demonstrates the start of a downtrend, even though the open of the second candlestick is greater than the close of the first candlestick. This pattern indicates increasing selling pressure.
Doji Reversal Signal:
Following the downtrend, a green Doji appears. Since the symbols occurring before the appearance of this Doji are bearish, this Doji provides an indication that BTC is about to experience a bullish trend reversal. The anticipated reversal materializes, with an uptrend starting at 14:04.
Uptrend Continuation:
This bullish trend continues until a bearish hammer appears at 14:06. As this hammer is formed during a bullish trend, it initially appears to be a bearish signal. However, in this context, the hammer is actually considered a bullish continuation signal for the uptrend.
Marubozu Confirmation:
Shortly thereafter, a sequence of green candlesticks demonstrates the continuation of this uptrend. This uptrend includes a green Marubozu signal, showing signs of strong and continued bullishness with buyers in full control.
Subsequent Reversal:
A short bearish trend follows thereafter, until another bullish Doji provides an indication of a possible bullish trend reversal, demonstrating the cyclical nature of market movements.
This example illustrates how combining multiple candlestick patterns can provide a comprehensive view of market dynamics and help traders make more informed decisions.
Conclusion
Both types of OHLC symbols — bar symbols and candlestick symbols — are excellent tools for predicting an asset's price action and understanding market dynamics. With a glance, these symbols quickly and succinctly tell the trader four important characteristics of a particular asset over a set period of time: the open, the high, the low, and the close.
Mastering OHLC chart analysis requires practice and experience. Traders should start by studying historical charts to recognize common patterns and understand how they play out in different market conditions. Combining OHLC analysis with other technical indicators, such as moving averages, volume analysis, and momentum oscillators, can significantly improve trading accuracy.
It is important to remember that no single pattern or indicator guarantees success in trading. Risk management, position sizing, and maintaining discipline are equally crucial components of a successful trading strategy. Traders should always use stop-loss orders and avoid risking more than a small percentage of their capital on any single trade.
As you develop your skills in reading OHLC charts, you will find that these visual tools become invaluable for making informed trading decisions across various asset classes and time frames. Whether you are day trading cryptocurrencies or investing in traditional stocks, OHLC charts provide the foundational data needed for effective technical analysis.
FAQ
What is an OHLC Chart? What does OHLC stand for?
OHLC stands for Open, High, Low, and Close prices. Each candlestick shows opening, highest, lowest, and closing prices within a specific time period. OHLC charts help traders analyze price movements and identify market trends effectively.
OHLC charts display Open, High, Low, and Close prices. Green candles indicate price increases, red candles show decreases. Analyze wicks and body length to identify trends, reversals, and market momentum for predicting future price movements.
How do OHLC charts help predict price movements? What are their practical applications in trading?
OHLC charts display open, high, low, and close prices, enabling traders to identify trends and support/resistance levels. They help predict price movements by revealing market structure and are essential for determining optimal entry and exit points in trading strategies.
What is the difference between OHLC charts and candlestick charts or bar charts?
OHLC charts display open, high, low, and close prices comprehensively. Candlestick and bar charts show only open and close prices without high and low details. OHLC charts provide more complete volatility analysis for precise price action prediction.
How to use OHLC data for technical analysis and trading decisions?
Analyze opening, high, low, and closing prices to identify trends and support/resistance levels. When close exceeds open, it signals bullish momentum; when close falls below open, it indicates bearish pressure. Combine OHLC patterns with moving averages and indicators for stronger trading signals and better decision-making accuracy.
What do the open price, high price, low price, and close price in an OHLC chart represent?
Open price is the first traded price when a period starts, high price is the highest price reached, low price is the lowest price reached, and close price is the final traded price when the period ends.
* The information is not intended to be and does not constitute financial advice or any other recommendation of any sort offered or endorsed by Gate.